Note: Be careful when sharpening as the tools will become very sharp, always face the blade away from you when sharpening.
To jump straight to ‘Sharpening’, click here.
If your plane has plastic handles, you might be able to feel a seam down the middle where the two halves of the handle are joined. If left, these seams will become uncomfortable and might cause blistering. Use a file or a card scraper to remove these, the texture will feel different and will appear less glossy, however you can apply a few coats of shellac if you want the glossiness to return. You can use sandpaper all over the handle if you do not like the feel of the glossy plastic.
Tip: If you have purchased a new plane, you may notice that there is a varnish coating applied all over, this is to reduce the risk of the plane rusting during distribution and storage. This can easily be removed from the sole by using abrasive paper or a suitable solvent.
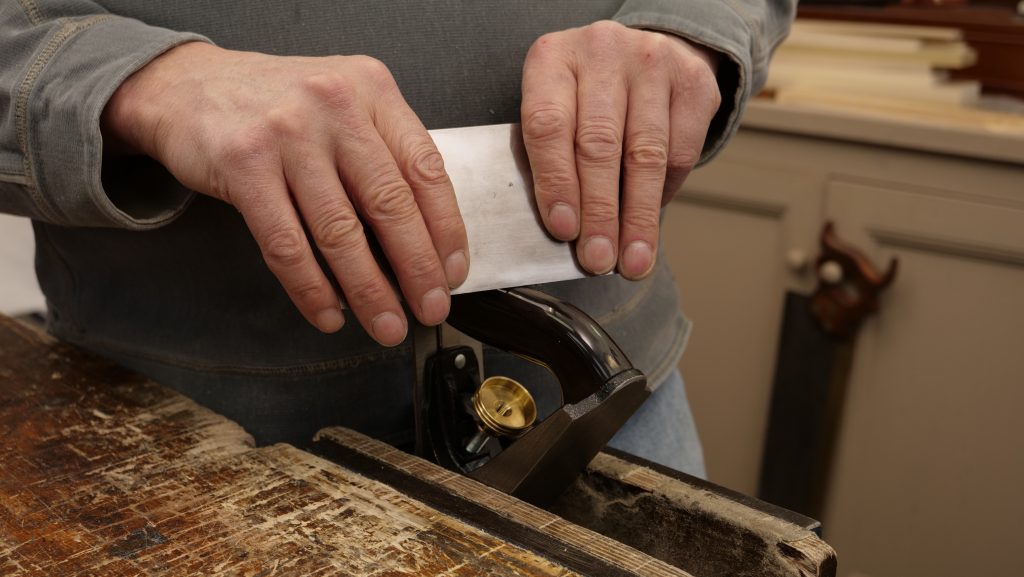
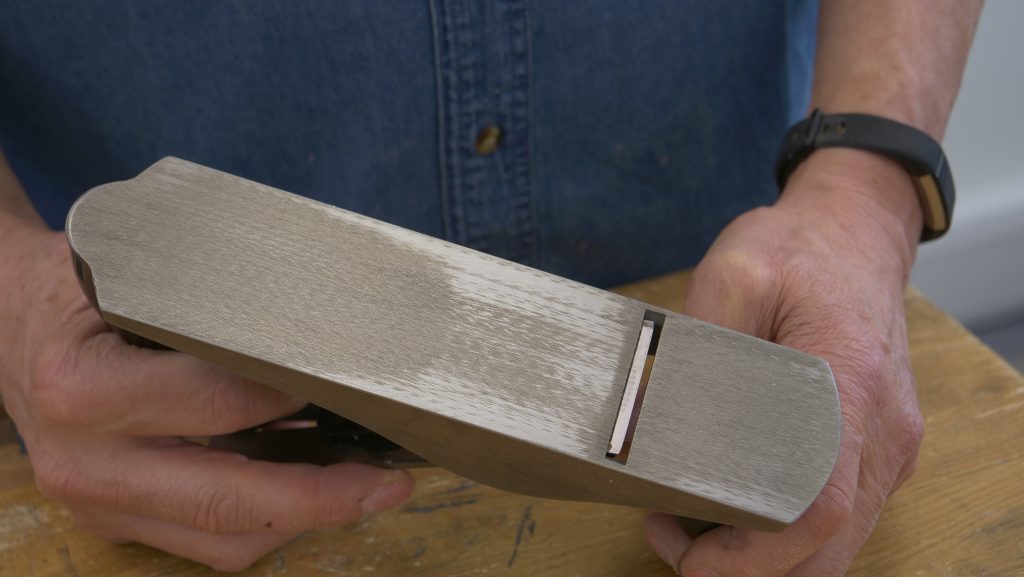
Check that the sole is flat by holding it up to the light with a straight edge against it, if you can see the light coming through then it means it is not flat. With the sole face down, rub it back and forth on the coarse diamond sharpening plate. Turn the plane over and see which part has been abraded away. Check the sole surface again using the light and the straightedge.

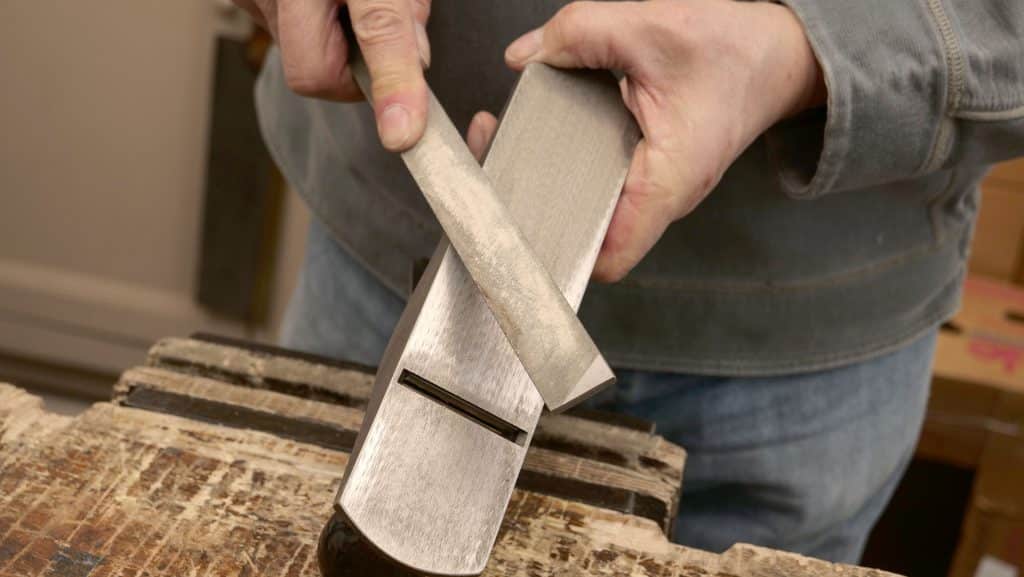
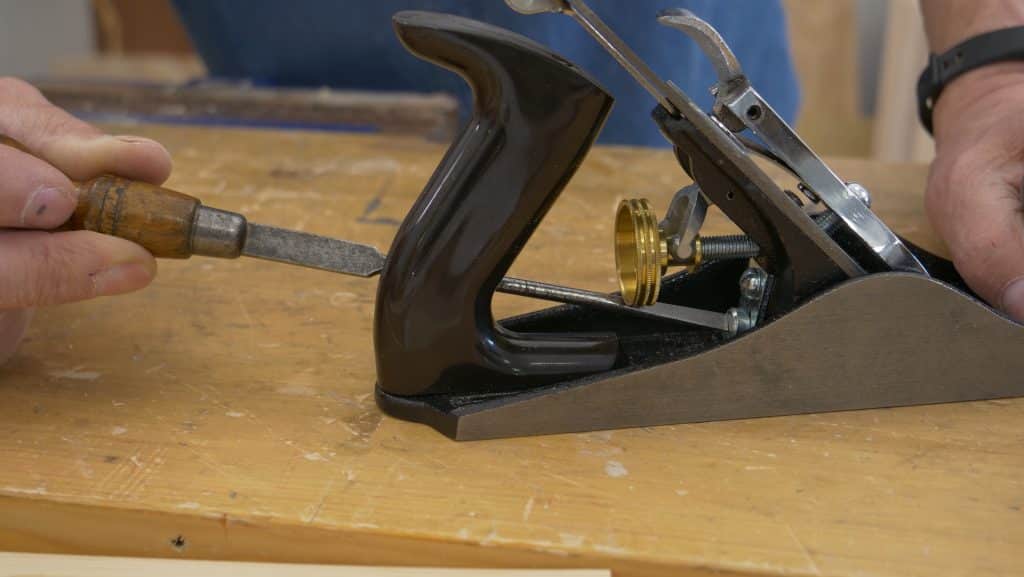
If the edge corners of the sole are sharp, use a file to ease the corners along the length. Change the angle slightly on the second and third strokes either side of the bevel to develop a more rounded corner. Repeat this step to round any sharp corners until you are satisfied with the smoothness. Having a softer edge will minimise the damage if the corners of the plane comes into contact with your project.
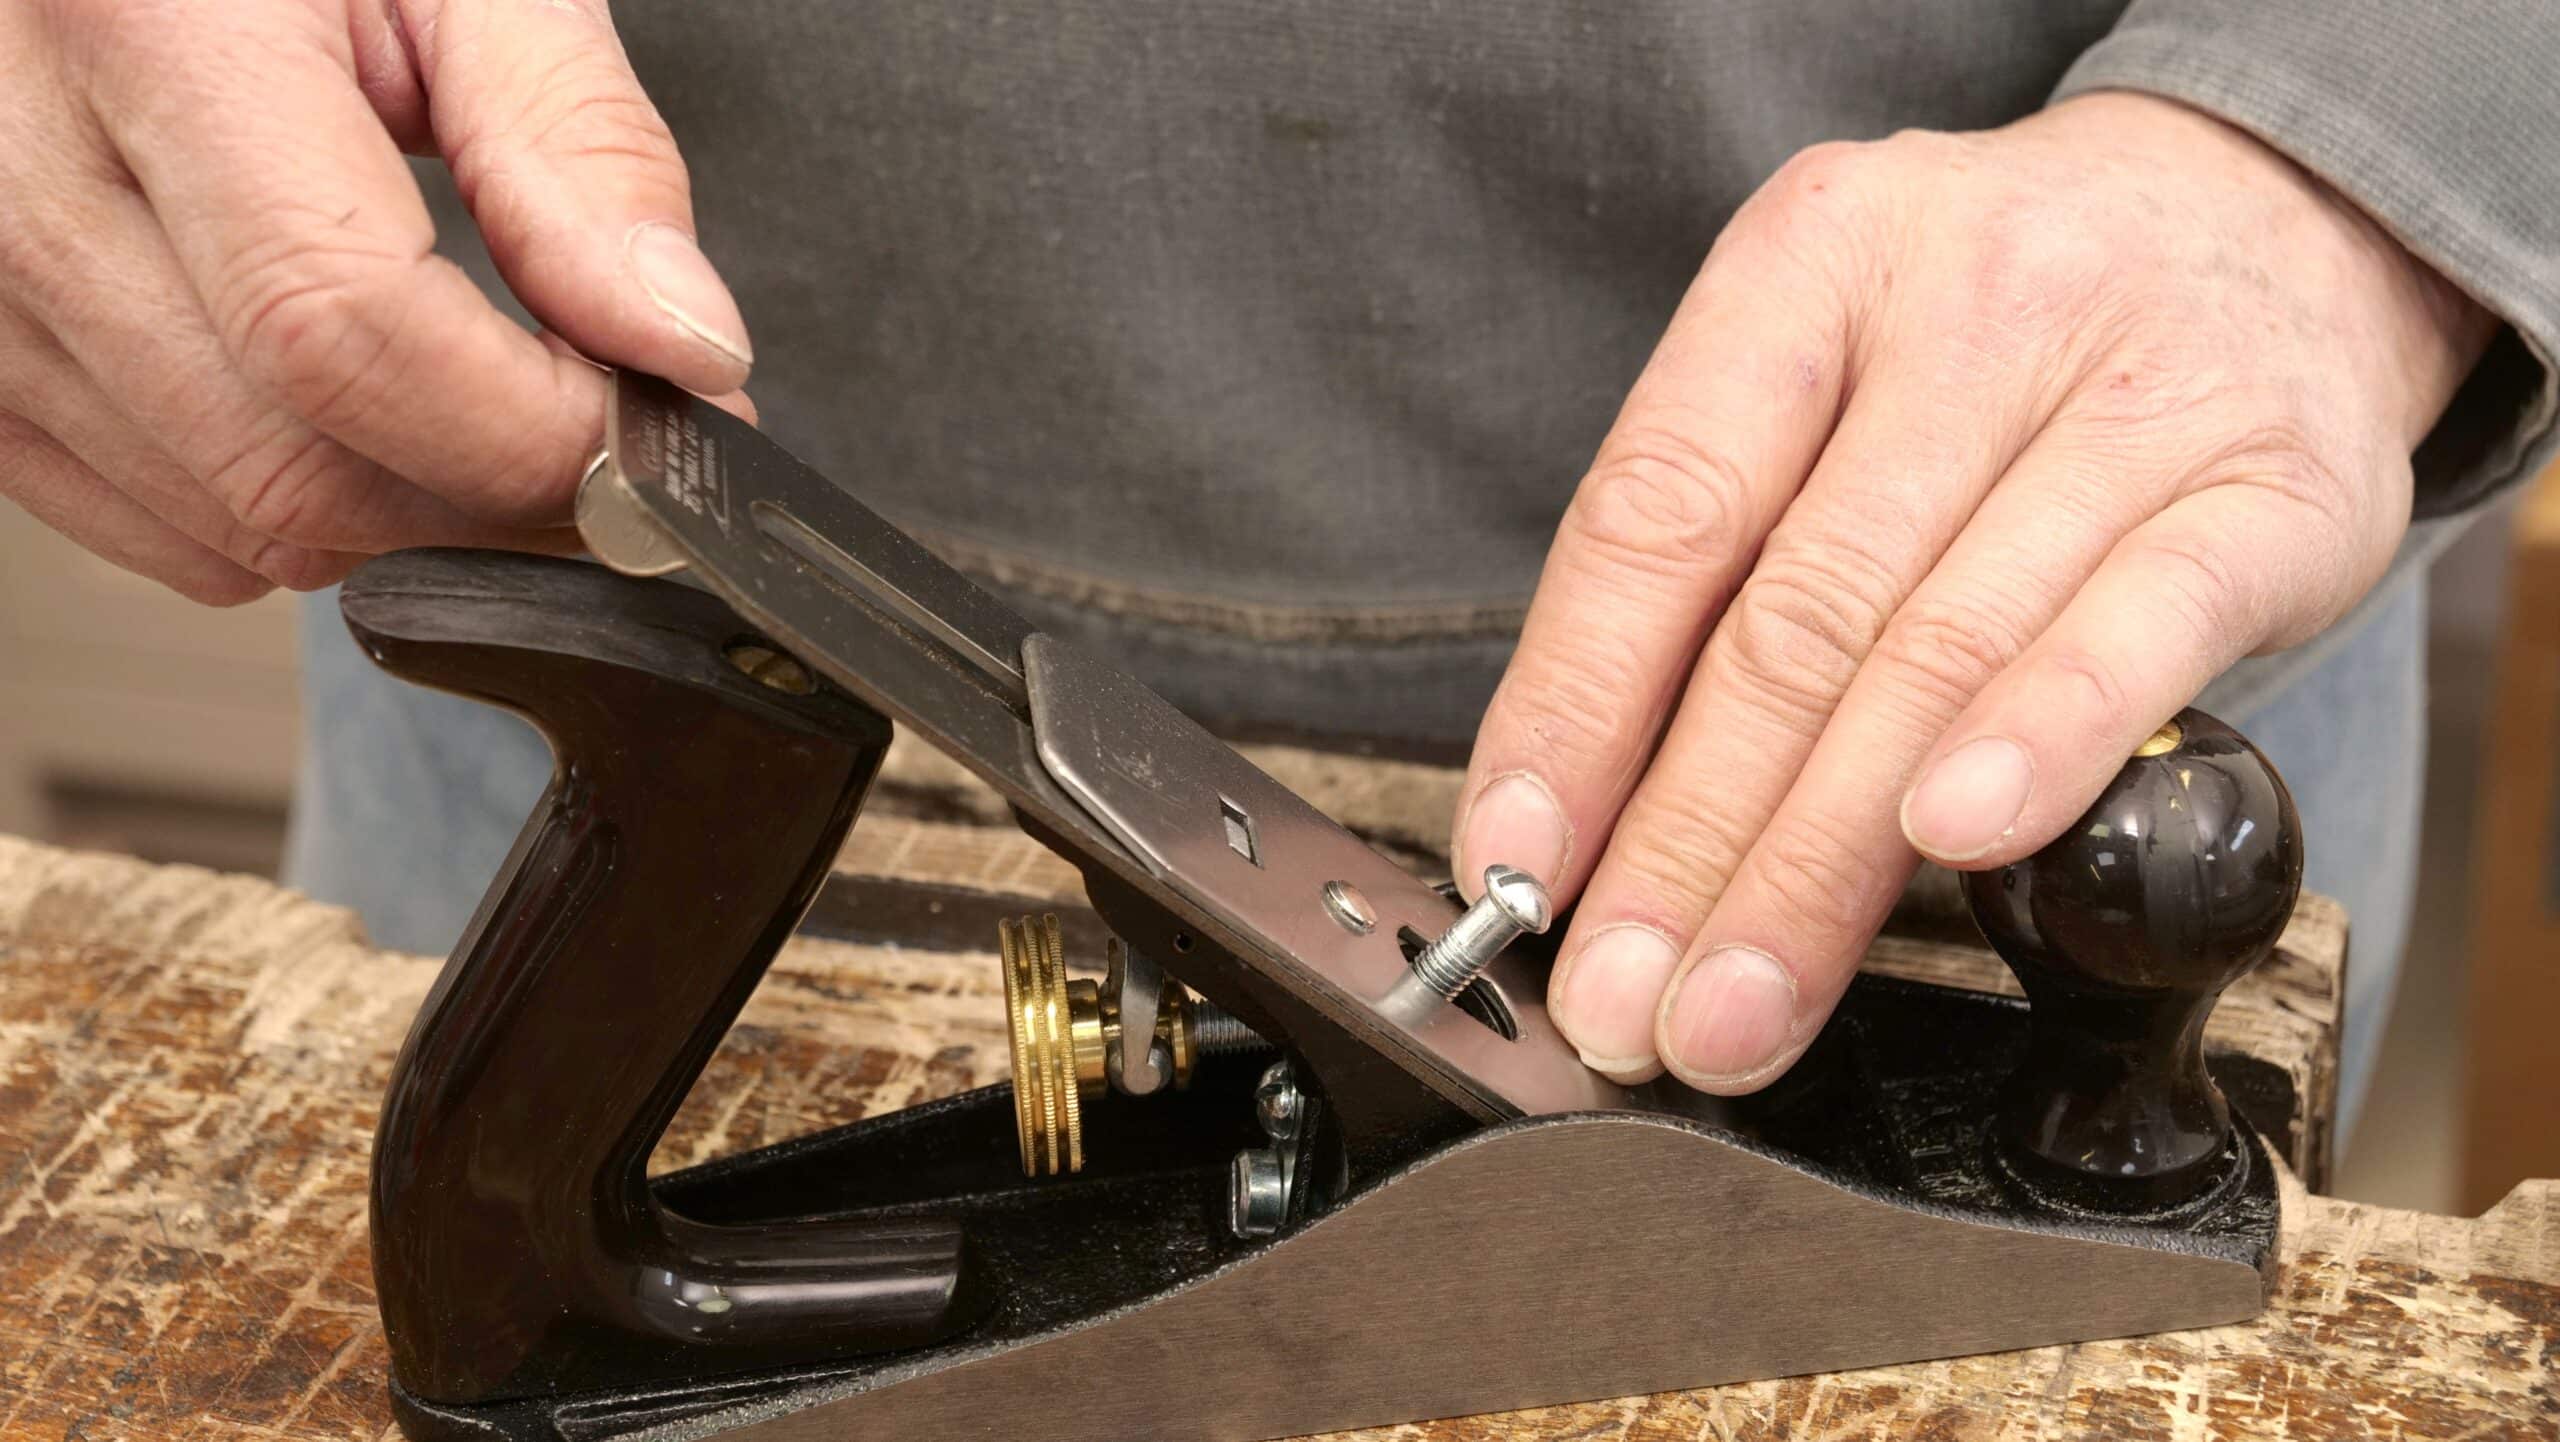
Remove the lever cap. If the lever feels stiff, use light machine oil to lubricate the mechanism. Continuously move the lever back and forth to ensure that the oil is worked into the moving parts.
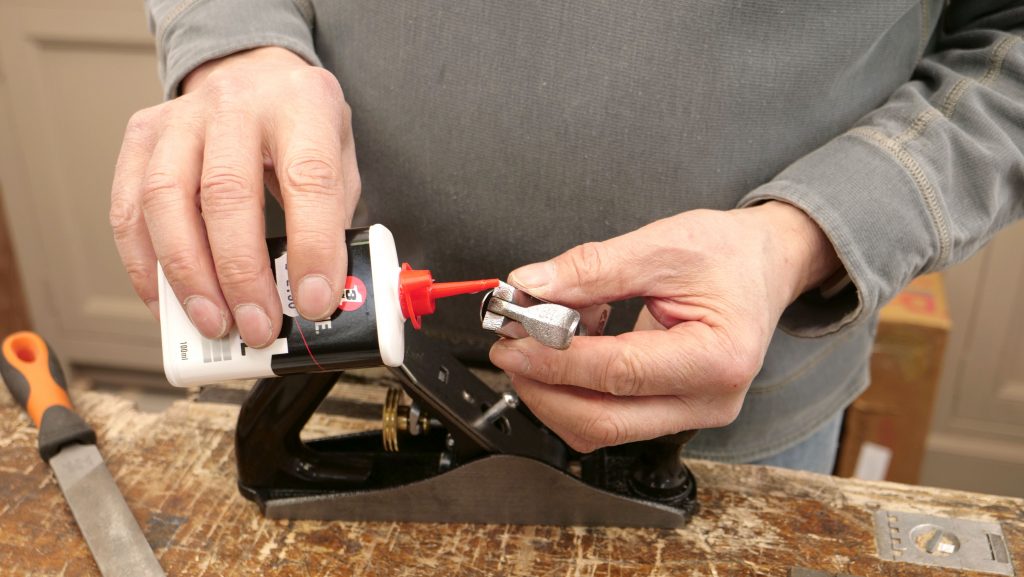
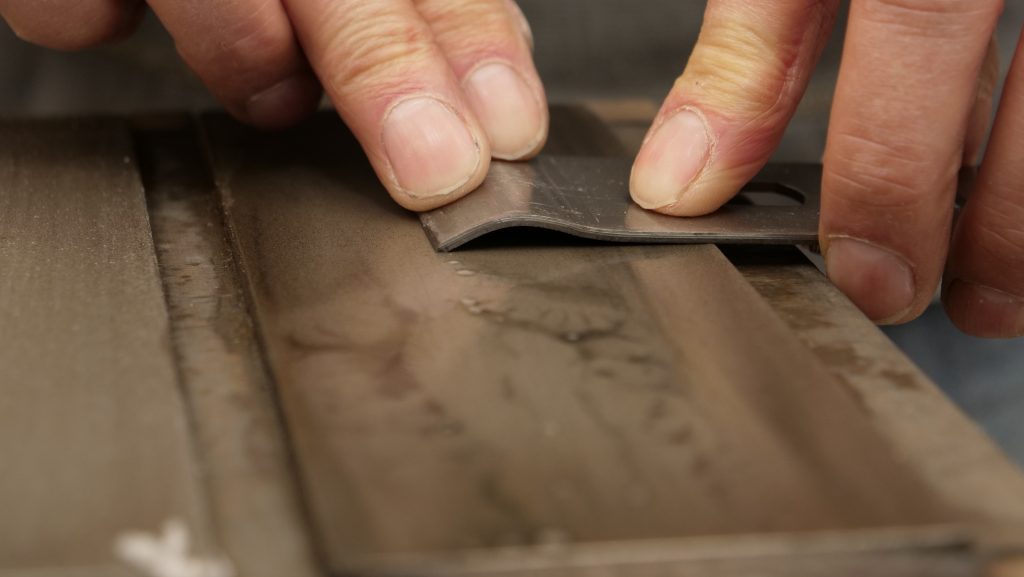
Sometimes the fore-edge of the cap iron needs additional flattening after manufacture. Separate the cap iron from the blade and spray your diamond plates with glass cleaner to float off the waste from the abrading . Place the cap iron on the sharpening plate with the hump as near to the edge as possible, this allows you to develop the under edge at an acceptable angle. If the full length of the cap iron was on the sharpening plate, it would be sharpening at the wrong angle. Rub back and forth to flatten the under edge as shown, you want to make sure cap iron mates to the blade without any gap at all.
Put this back on the blade by crossing them over and swivelling them together. This is for safety as it means the actual cutting edge is never facing towards your opposing hand.
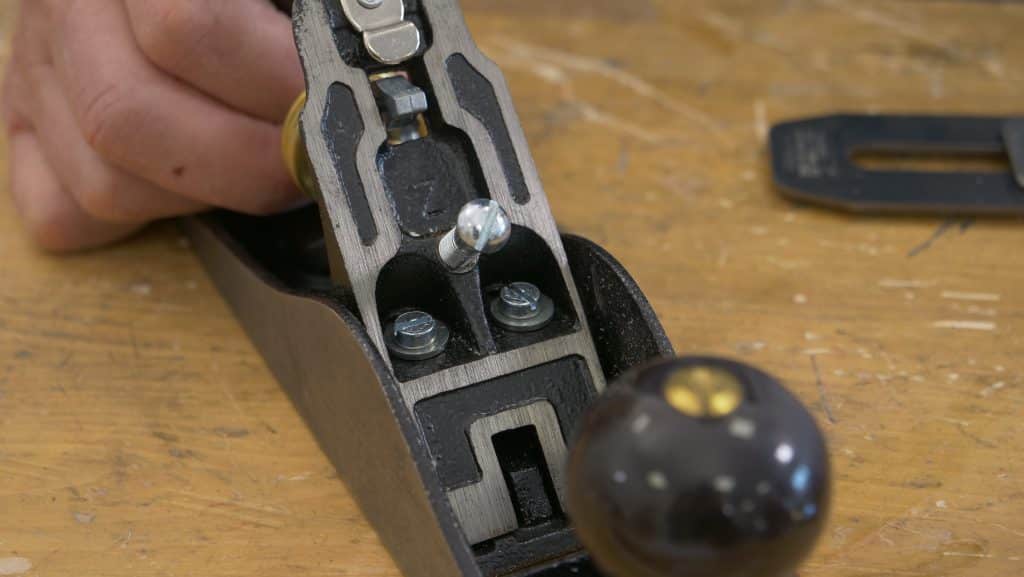
Once you have removed the cap iron and the cutting blade assembly, you will be able to see the inside face of the frog. You can adjust the position of the frog in relation to the sole using the adjustment screw at the back of the frog, this will move the frog back or forward which adjusts the mouth opening.
In order to adjust the frog, the two setscrews in the frog will need to be loosened to finger tight. You can then use a screwdriver to adjust the adjustment screw which will move the frog forwards or backwards, be sure to tighten up the two setscrews when you are happy with the position. You only need to adjust the frog very occasionally, for instance when you have difficult grain. You can get a cleaner cut when the frog is further forward, however this closes up the throat which disallows heavy cuts and thick shavings. For general use you want the ability to change the plane set to include thicker shavings without the throat clogging. The blade lies on the bed (angled rake) of the frog. Adjust the frog until the underside of the blade, the bevelled side, sits in line with the back edge of the mouth opening. You can check this alignment using a straightedge like a steel rule or the edge of a square. When you are happy the angle is lined up, tighten the setscrews fully.

Once you have lined up the cap iron assembly onto the frog, place the lever cap on top and make sure the thumb lever has some resistance. If it is easy to press back, you will need to adjust the cutting iron assembly screw until the lever requires slight force to push back (it should “clunk” into place), turn the screw clockwise to tighten and anticlockwise to loosen.
Once you have set up your plane, it is ready to sharpen.
To see the parts of the plane see the parts section on the plane tool guide .
You can tell when the blade needs sharpening by looking out for one of these indicators:
To sharpen the cutting iron, you will need:
The plane blade is sharpened in a similar way to the chisel, to read about this, click here.
Spray auto glass cleaner onto each of your diamond sharpening plates, one pump on each plate is plenty. This is used instead of water as water often starts the rusting process on the sharpening plates. Using the glass cleaner helps ensure they keep in good condition. Place the beveled edge down on the coarse plate. Apply pressure on the end of the cutting iron, push and pull it along the plate several times lengthways. Start with the blade at 30 degrees and end it at 20/25 degrees, this will ensure it has a slight camber to the bevel. This plate generally requires the most work as it will be abrading away the previous dulled edge to form the new cutting edge.
Repeat the previous steps on the fine diamond plate followed by the super fine level. These two levels will continue to refine the abrasions left by the subsequent levels of abrading . A burr will have formed at the cutting edge, carefully pinch the burr with your fingertips and the waste steel will come away in a narrow strip.
Place the strop in your vise with the leather side facing up. The leather holds the waxed abrasive called buffing compound to the surface so that you can use it to refine the edge using this final level of abrading . Rub the buffing compound on generously to cover the surface of your block. Apply the beveled edge to the strop and pull the bevelled face across the strop 30 times. When stropping, ensure you don’t push the actual cutting edge into the strop because it will cut into the surface of the strop and damage it.
Turn the block over to the plain wood side and add the buffing compound to this wooden surface. This time abrade the flat surface face down onto the buffing compound keeping the blade dead flat. This final step serves to polish out any abrasive marks left in the surface to give the refined finish we need on the back of the blade. Finish off by removing any waxy residue with a soft cloth or tissue.
Put the parts back together and turn the adjustment wheel until the blade touches the wood when you test it on the edge of a scrap piece of wood. Move the plane across the surface to see if shavings appear, if not keep adjusting the wheel until this happens. When shavings are being produced, check to see if they are coming from both sides of the blade, if not, move the lateral adjustment lever until you get the same thickness of shaving from both sides of the mouth of the plane.
To read more on planes, we recommend the following from Paul’s blog: