
Sometimes you need to convert an Illustrator file to grayscale. This could be for a print ad, logo option, or even just to try something different. In Illustrator CS3 you have several options to easily change and edit any artwork to grayscale. There are a couple of simple options and a couple of options that give you more control of how the artwork will look.
This tutorial was created with Illustrator CS3.
Below is the original artwork with the four grayscale Illustrator options for comparison.

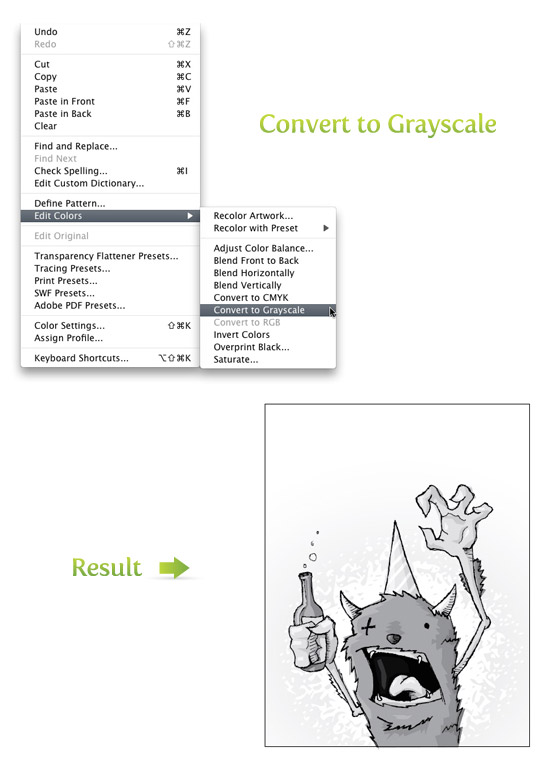
This is probably the quickest but least versatile option. Select your artwork and go Edit > Edit Colors > Convert to Grayscale.
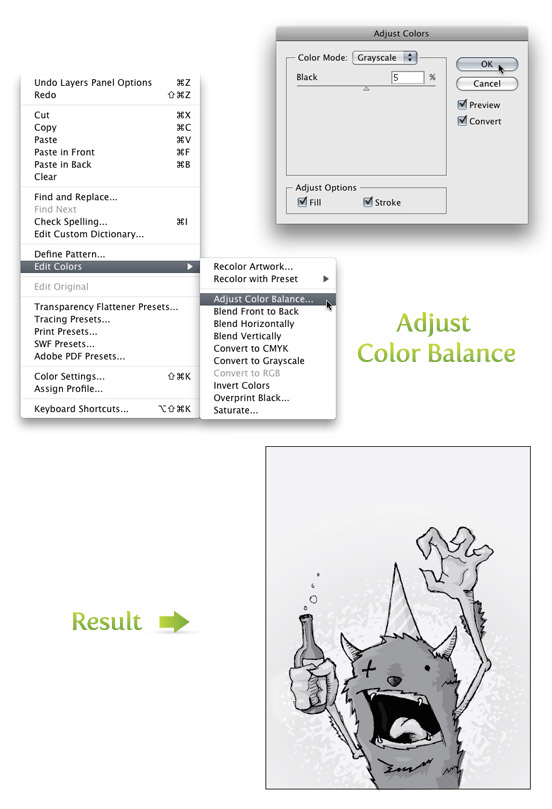
With this option, you have more control over the Black. Select your artwork and go Edit >Edit Colors > Adjust Color Balance. Select Grayscale from the Color Mode drop-down menu and check the Preview and Convert boxes. Now you can adjust the Black percentage with the slider.
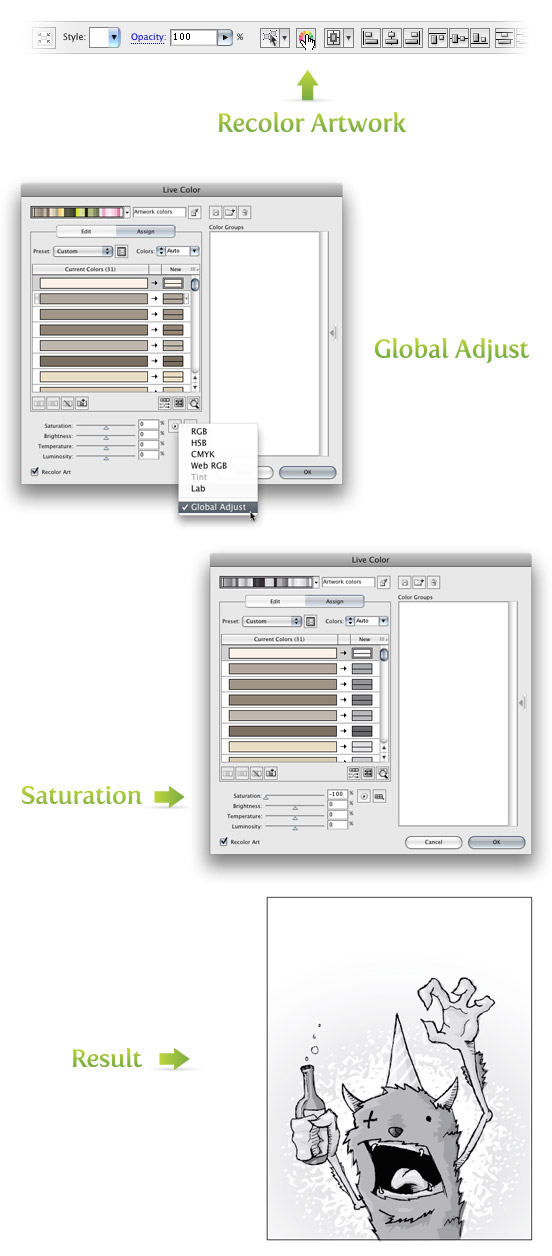
If you still want more control over the grayscale Illustrator vector, try the Adjust Color Balance option. Select your artwork and go Edit > Edit Colors > Recolor Artwork or click to color wheel icon in the control panel. Either way, it will bring up the Live Color dialog. At the very bottom of the dialog are sliders. To the right of the sliders are two buttons. Press the button that looks like a play button. Choose Global Adjust from the drop-down list and move the Saturation slider all the way to the left (-100). Play around with the Brightness, Temperature, and Luminosity sliders to get different results.
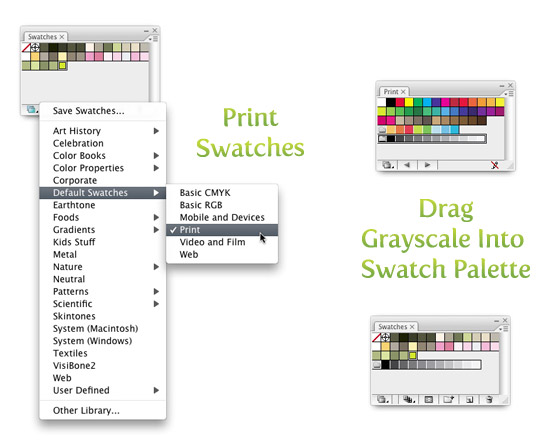
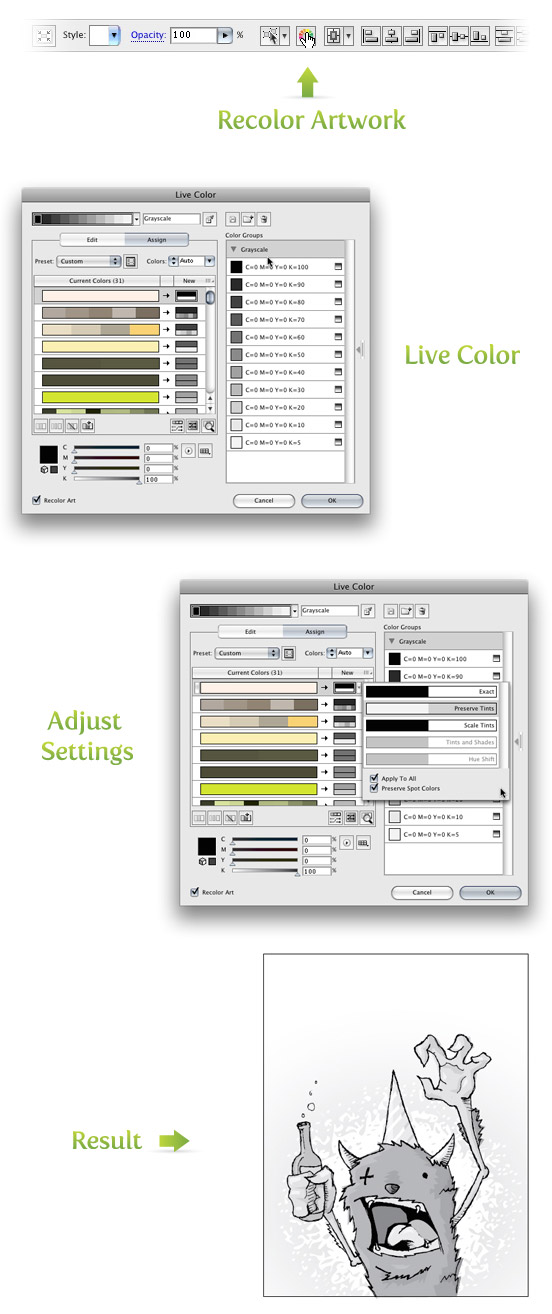
If none of the previous options had enough control, you can try the Recolor Artwork option. First, you will need to load the default Print swatches if they are not open. Open the Swatch Libraries Menu on the bottom left of the Swatch panel and go Default Swatches > Print. Once these swatches are open, drag the folder of grayscale swatches into your Swatch panel. Again, you only need to do this if you don’t have the default print swatches open.
Now you can select the artwork and go Edit > Edit Colors > Recolor Artwork or click the color wheel icon in the control panel. Once in the Live Color dialog, select the Grayscale set of swatches in the right Color Group column. Now the artwork is grayscale, but the Live Color dialog lets you edit the black swatches assigned to the original colors.
Click the play button next to the sliders at the bottom of the Live Color dialog and select CYMK. Select the original color that you wish to edit from the Current Colors column and use the K (black) slider at the bottom to edit the black percentage . If you hover over the grayscale swatches in the New column next to the Current Colors on the left, you will see an arrow for a drop-down menu. I like Preserve Tints, but try the others for different results.
Ultimately, I liked the Adjust Color Balance option results, but I have used every option for different artwork. Which way works best for you? Hope this grayscale Illustrator tutorial has been helpful. Try it out!

I am extremely inspired along with your writing abilities and also with the structure on your weblog. Is that this a paid topic or did you modify it yourself? Anyway keep up the excellent high quality writing, it’s uncommon to peer a great weblog like this one today.